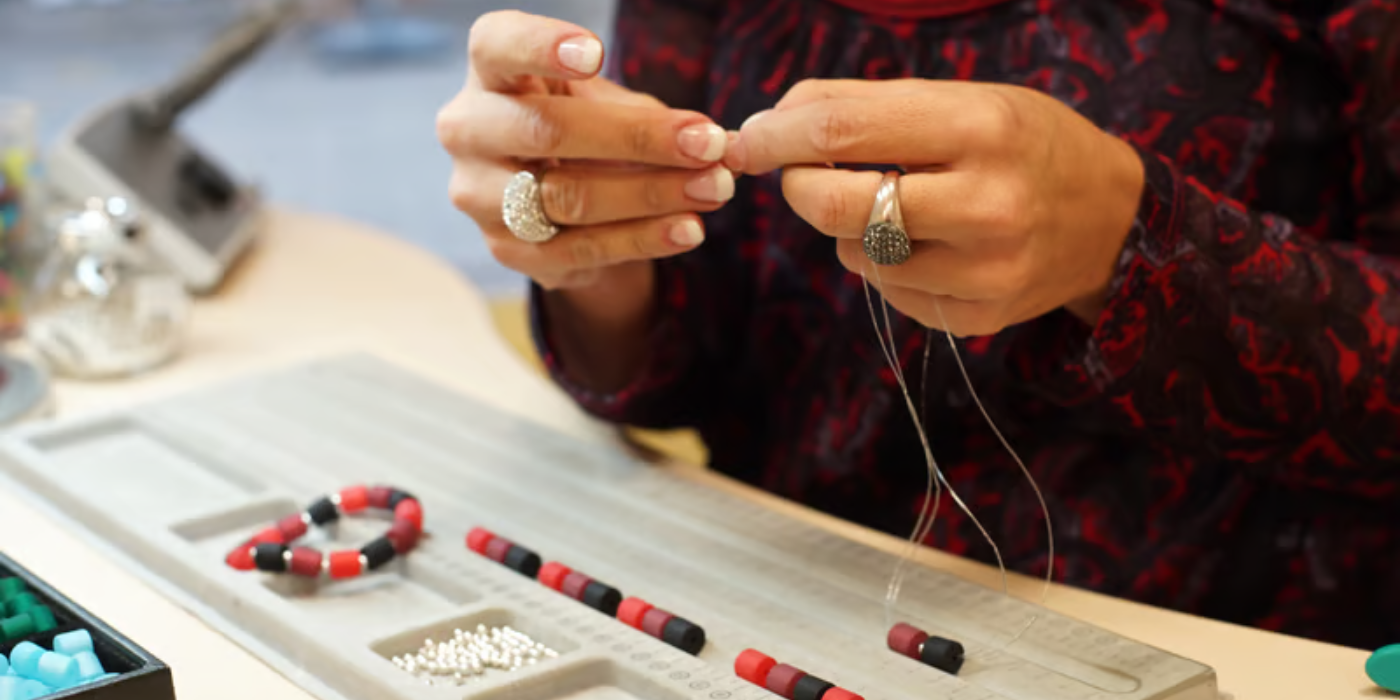

How to Make a Simple Tila Bead Bracelet
You’re running a small jewelry business, and you decide to create the viral Instagram Tila bead bracelet everyone has been talking about. It feels like the perfect start. The design looks simple enough, and you’re confident it will turn out just like the ones you’ve seen online.
But as the bracelet starts to take shape, something feels off. The design doesn’t align the way it should, the beads don’t sit evenly, and instead of a balanced pattern, you’re left with a design that looks slightly uneven and out of sync. What was supposed to be a clean, aesthetic piece suddenly feels frustratingly imperfect.
That’s exactly where this guide helps. It walks you step by step through the process so you can avoid those early mistakes, understand bead alignment, and build a structured approach from the start. By the end, you’ll know not just how to make a Tila bead bracelet, but how to control symmetry, maintain balance, and turn a simple idea into a polished, wearable piece that actually looks Instagram-ready.
What is a Simple Tila Bead Bracelet
A simple Tila bead bracelet is a handmade jewelry piece created using flat, square-shaped beads called Tila beads. These beads usually have two holes, which allow them to lie flat and connect neatly in structured patterns. The result is a smooth, balanced bracelet that often features geometric designs, stripes, spirals, or color blocks.
Tila bead bracelets are popular because they look modern yet minimal, and they can be customized easily with different color combinations and finishes like matte, metallic, or glossy glass. They are commonly made using fine beading thread or elastic cord, making them both stylish and comfortable for everyday wear.
Read more: Valentine's Day Gemstone Necklaces: Our Top Picks
Tila Bead Bracelet Tutorial: Getting Started
Before you begin learning how to make a Tila bead bracelet, prepare your workspace, tools, and design plan. This stage is what separates a balanced, professional-looking bracelet from one that feels uneven or unfinished. Once everything is ready and clearly planned, the actual stitching becomes much easier and more enjoyable.
Gather Your Tools and Materials
Start by collecting all the essentials in one place. You will need colorful or transparent Tila beads in your chosen colors, fine beading thread or nylon cord, a thin beading needle, seed beads for spacing, and a clasp or elastic, depending on your bracelet style. Keep scissors nearby for trimming excess thread, and jewelry glue if you want extra security for your knots. Having everything ready before you begin helps you avoid interruptions during the beading process.
Miyuki Tila Bracelet Tutorial: Step-by-Step Instructions

Now that your tools are ready and your design is planned, this Miyuki Tila bracelet tutorial will guide you through the actual beading process step by step. Work slowly and focus on keeping your tension consistent, because this is what decides whether your bracelet turns out smooth and balanced or uneven.
Here is how to make a Tila bead bracelet:
Step 1: Plan Your Bracelet Design
The Miyuki Tila bracelet tutorial starts with deciding how your bracelet will look before you start threading. Choose a simple color combination, especially if you are a beginner, so you can clearly see your pattern as it develops. Measure your wrist carefully and decide the final bracelet length, leaving extra space for closures or knots. Then choose whether you want a straight, spiral, or geometric pattern. A clear plan at this stage helps maintain symmetry and balance, ensuring your bracelet looks neat and intentional instead of uneven.
Step 2: Cut and Prepare Your Thread
Now take a strong beading thread or nylon cord and cut a length that is at least 3–4 inches longer than your wrist size. This extra space is important for finishing knots and attaching the clasp. Thread your beading needle carefully, making sure it passes smoothly through the Tila bead holes. To stop beads from slipping off, secure one end with a stopper bead or a simple knot. This gives you control when starting your first row. At this stage, also make sure your workspace is clean, and your beads are sorted so you can work without interruptions.
Step 3: Create the Base Row
Begin your bracelet by adding the first set of Tila beads according to your planned pattern. Slide them gently down the thread, so they sit flat and in order. Do not rush this step because the base row acts as the foundation for the entire bracelet. If your beads are misaligned here, the rest of the design will also look uneven. Keep your thread tension light but controlled so the beads sit close without forcing them.
Step 4: Build the Pattern Gradually
Continue adding Tila beads row by row, following your design plan. If your bracelet includes seed beads, use them as spacers to maintain structure and prevent gaps. Always pull your thread evenly after each addition so the beads settle properly. This is where your bracelet starts to take shape, so consistency is key. Avoid tightening too much, as it can distort the flat alignment of Tila beads.
Step 5: Maintain Symmetry While Working
As the bracelet grows longer, pause after every few rows to check alignment. Gently adjust beads if they shift out of place. Uneven tension is the most common reason beginners end up with a crooked or twisted bracelet. Keeping a steady rhythm while checking balance helps maintain a clean, professional finish.
Step 6: Secure and Finish the Bracelet
Once you reach your desired length, reinforce the structure by weaving the thread back through multiple rows of beads. This locks everything in place and adds durability. Attach your clasp securely or tie a strong knot if using an elastic cord. Trim any excess thread carefully, and optionally apply a tiny drop of jewelry glue to secure knots for long-term wear.
Read more: Real vs Fake Stone Bracelets: How to Tell Before You Buy
Common Beginner Tila Bead Bracelet Mistakes
When learning how to make a Tila bead bracelet, small errors can easily affect the final look of your design. The good news is that most of these mistakes are common and completely avoidable once you know what to look for.
Here are the most common beginner Tila bead bracelet mistakes to avoid:
Inconsistent Thread Tension
One of the biggest issues beginners face is uneven tension. Pulling the thread too tightly can distort the flat shape of Tila beads, while leaving it too loose creates visible gaps between rows. The key is to keep a steady, controlled pull throughout the entire process.
Skipping Proper Design Planning
Starting without a clear plan often leads to an imbalance in color patterns or even running out of beads mid-project. Always map out your design, choose your colors carefully, and estimate your bracelet length before you begin.
Rushing the Base Row
The first row sets the foundation for your entire bracelet. If it is uneven or loosely structured, every row after it will be affected. Take your time here to ensure beads sit flat and aligned.
Overcomplicating the Design
Many beginners try to use too many colors or complex patterns at once. This can make it harder to maintain symmetry. Start simple, master the structure, and then move toward more advanced spiral or geometric designs.
Ignoring Small Adjustments While Working
As the bracelet grows, beads may shift slightly. Not correcting them early can lead to a crooked or unbalanced finish. Regularly check your work and make small adjustments as needed.
Tila Beads Bracelet Ideas You Can Try Next

Once you understand the basics of bead alignment and tension, you can start experimenting with a new Tila beads bracelet pattern that matches your style. This is where your creativity really comes in, and it also helps you improve your control over structure and symmetry while practicing how to make a Tila bead bracelet.
Here are a few Tila bead bracelet pattern ideas you can try for your next project:
Two-Color Minimal Bracelet
This is the easiest variation for beginners. You simply alternate between two contrasting colors to create a clean, modern look. It’s simple but visually striking, and it helps you focus on maintaining even spacing.
Spiral Pattern Design
The spiral style is the same viral design you often see on Instagram. It uses color shifts and careful tension control to create a twisting effect. This design requires more attention to alignment but gives a very trendy, eye-catching finish.
Geometric Block Pattern
Instead of flowing designs, this variation uses structured blocks of color. It gives a bold, graphic look and works well with metallic or matte finishes. Precision is key here, as every block must stay aligned.
Mixed Seed Bead Combination
You can also combine Tila beads with seed beads to create texture and spacing effects. This adds depth to your bracelet and makes the design more flexible and detailed.
Layered Bracelet Style
Once you’re confident, try making multiple thin Tila bead bracelets and stacking them together. Mixing colors and patterns in layers creates a stylish, boutique-like jewelry set.
Care and Maintenance Tips
Once you’ve finished your bracelet, proper care will help it stay in good shape and maintain its original look for a long time. Since Tila beads are made of glass and the structure depends on thread tension, a little attention goes a long way in keeping them durable.
Avoid Water and Harsh Chemicals
Try not to expose your bracelet to water, perfumes, or cleaning products. These can weaken the thread over time and also dull the shine of the beads, especially if they have a metallic or coated finish.
Store It Properly
When you’re not wearing it, keep your bracelet in a soft pouch or jewelry box. Avoid tossing it with other accessories, as friction can scratch the beads or loosen the thread structure.
Clean It Gently
If your bracelet gets dirty, wipe it gently with a soft, dry cloth. Avoid soaking it in water or using strong cleaning agents, as this can damage both the thread and bead finish.
Handle With Care During Wear
Avoid pulling or stretching the bracelet too hard, especially if it’s made with thread instead of elastic. Gentle handling helps maintain symmetry and prevents breakage.
Taking care of your bracelet properly ensures that all the effort you put into learning how to make a Tila bead bracelet pays off with a long-lasting, wearable piece.
Final Thoughts on How to Make a Tila Bead Bracelet
Creating your own Tila bead bracelet is more than just a craft project—it’s a process of learning patience, precision, and creativity. What often starts as a simple idea can quickly turn into a detailed design journey where every bead placement matters.
If you follow the steps carefully, from planning your design to maintaining proper tension and finishing with care, you can avoid the common issues that lead to uneven or unbalanced results. The key is not rushing the process and giving attention to small details that shape the final look.
As you continue practicing, you’ll notice your hands becoming more confident and your designs becoming more refined. With time, you can move from simple patterns to more complex spirals and layered styles. Mastering how to make a Tila bead bracelet is not just about following instructions—it’s about developing your own style and turning basic materials into something personal, wearable, and truly unique.
Bring Your Bracelet Design to Life
Now it’s your turn to put everything into practice. Grab your beads from Theory of Beads, choose your favorite color combination, and start creating your own design. Also, explore stone necklaces, natural stone earrings, and stone bracelets to expand your jewelry style. Keep experimenting, keep creating, and let each piece reflect your personal creativity.
FAQs
Are Tila bead bracelets good for beginners?
Yes, they are beginner-friendly as long as you start with simple patterns. The flat shape of Tila beads helps create structured designs once you understand basic tension control.
What thread is best for Tila bead bracelets?
Strong nylon beading thread or FireLine-style thread works best because it can pass through small bead holes multiple times without breaking.
Why does my Tila bead bracelet look uneven?
Uneven results usually come from inconsistent thread tension or skipping proper design planning. Keeping your tension steady is key to a balanced finish.
Can I use elastic instead of thread?
Yes, an elastic cord can be used for stretch bracelets, but thread is better for detailed patterns like spirals because it offers more control.
How long does it take to make one bracelet?
A simple Tila bead bracelet can take 30 minutes to 2 hours, depending on your design complexity and experience level.